Basic Selenium Webdriver automation practice with C#
Basic Selenium Webdriver automation practice with C#:
To create a basic project with Selenium Webdriver, we follow bellow steps:
- In visual Studio, create a project called SeleniumFirst: File-> New Project -> Select Console App.
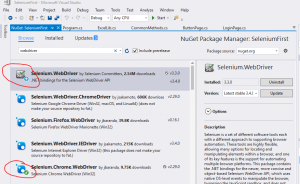
- Use Manage NuGet Packages to find and install Selenium.WebDriver and Selenium.Chrome.WebDriver driver (or any other browsers).
3. In Program.cs file, write your test script:
- Initial and define chrome driver
- Launch the url
- Define web elements base on your test case purpose and an input value for them.
- Expected behavior verification.
- Close the browser
Here is an basic Selenium webdriver automation example :
static void Main(string[] args)
{
//Init and define chrome driver
IWebDriver driver = new ChromeDriver();
//Launch the url
driver.Navigate().GoToUrl(“https://demo.econz.co.nz:1000/AdminPortal/Account/Login/exptest”);
//Username definition and input
IWebElement Username = driver.FindElement(By.Id(“UserName”));
Username.SendKeys(“Jiya”);
//Password definition and input
IWebElement Password = driver.FindElement(By.Id(“Password”));
Password.SendKeys(“Jiya@345”);
//Login button definition and input
IWebElement LoginButton = driver.FindElement(By.XPath(“/html/body/div[3]/form/div/div/div/div[2]/div[3]/input”));
LoginButton.Click();
//Verification
string ActualText = driver.FindElement(By.XPath(“//*[@id=’container’]/div/div/h2”)).Text;
string ExpectedText = “Welcome”;
if(ActualText.ToLower() == ExpectedText.ToLower())
{
Console.WriteLine(“Logged in successfully”);
}
else
{
Console.WriteLine(“Unable to Login”);
}
}
Selenium Introduction Advanced Selenium automation with C# (Taking screenshot)